In the 1980’s when we lived in Ecuador I bought two ceiling fans for a house that we were building at the time. They were considered fashionable in those days and I was happy to have fixtures that were not only stylish but also functional. The temperature often got quite high in the tropical port city of Guayaquil and they provided much needed relief from the stifling heat . Fast forward 28 years. I’m sad to admit that now my little fans are considered tacky, dated and downright ugly. One of them stopped working long ago and only the lights portion was still functioning, but the other fan still works perfectly. That’s pretty amazing after 28 years. I actually like ceiling fans and I was reluctant to throw away the one that still worked. We don’t live in such a hot country anymore but it can sometimes get into the 80 to 85 degree range so I still use the fan quite often. I have it installed in the kitchen. The only problem is that it just looked outdated and boring.

Here is a before shot. The woven center part of the blades was particularly passé

I decided to at least try and give it a facelift. What I had initially planned on doing was to simply paint the blades a bright color. I unscrewed the 8 little screws that held them in place and took them down. After cleaning them up (isn’t it amazing how grimy kitchen fixtures can get?) I remembered the bottle of Mod Podge that was lurking in my crafts box and I figured I could decoupage something on the blades rather than just painting them. I ended up using some left over fabric from the dining room chairs.

After spraying on a primer, I spray painted the edges yellow because I didn’t want to extend the decoupage fabric up over the edges of the blades.


I cut the pieces of fabric in the shape of the blades, using one of the blades as a template

In order to get a smooth finish I turned the blades over and glued the fabric to the non-wicker side. Now the woven wicker part faces the ceiling and is not visible. I used Mod Podge as glue to decoupage the fabric onto the blades, adding a couple of generous coats of it on top of the fabric too. After the blades were dry, I sprayed on two coats of clear varnish.
The blades ended up looking like they were actually hand painted and they even fooled hubby who complimented me on my artistic skills. If he only knew that I can’t paint anything more advanced than a stick figure, hehe. After checking out a couple of blogs and a few websites I realized that it was also possible to spray paint the metal face plates on ceiling fans. Alot of people had done it and it looked really cool. I wanted to camouflage the outdated brass tone on the body of the fan and paint was the perfect solution. There were only four screws holding it in place and it was simple enough to remove them and slide the face plate off. Easy peasy…right? Wrong. I didn’t realize at the time that all those online instructions for removing the face plate were meant for fans without lights. It wasn’t until I excitedly began taking out the screws that I realized that the middle hole of the plate would never slide down past the four tulip lights. I hate it when I do dumb things like that. I ended up having to convince hubby to help me take the whole fan down off the ceiling and temporarily unwiring and separating the center portion in order to get the plate off. What a hassle. Thankfully he is very handy with these things.

See that center opening? How in the world did I ever think that it was going to slide down past the four tulip lights that jut out to the sides?

I had to separate the lights portion from the rest of the fan in order to get the face plate to come off. That meant separating two of the wires.

Here’s the faceplate and the hardware from the blades after their first coat of yellow paint.

These are the blades drying in the sun after the final coat of glossy spray varnish

The glass parts got a much needed scrubbing

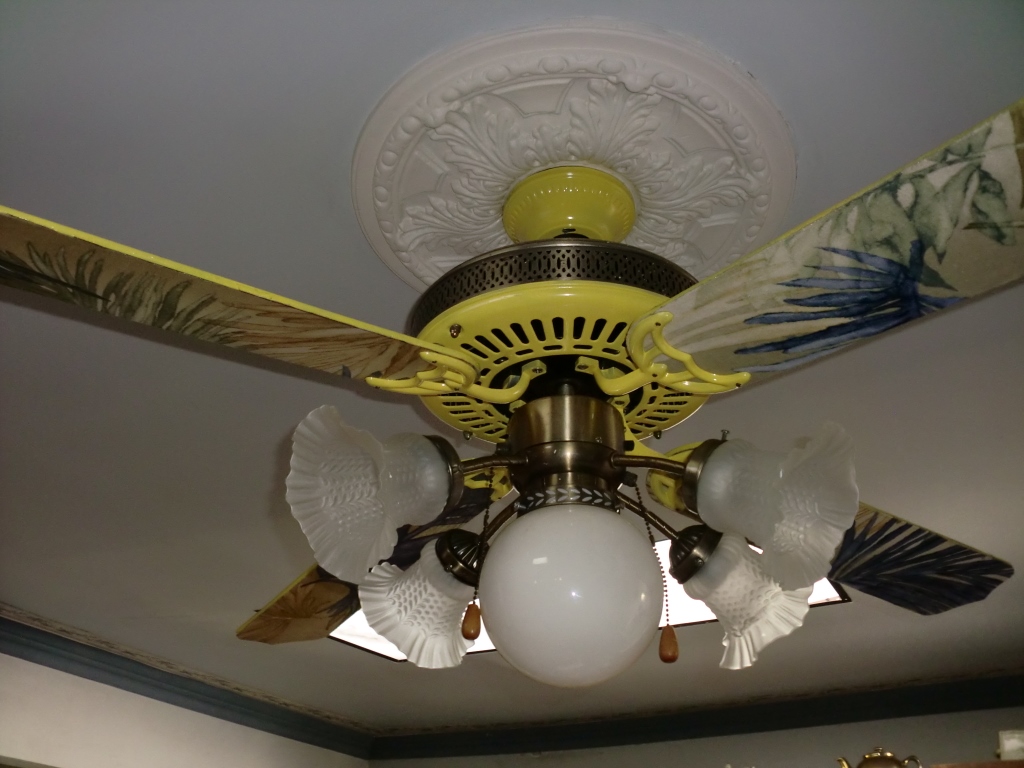
Here it is all finished and hung back in it’s place above the kitchen island


I also harvested some of the parts from the non working fan including the four blades and their hardware which I spray painted pink. I decoupaged these in a different style and I can just change the blades whenever I want a whole different look. It’s just a matter of removing the screws and it doesn’t take more than 5 or 10 minutes. Admittedly pink doesn’t really go with anything in my kitchen but who cares? Who says fans have to match!

Four extra fan blades for a different look. These got a top coat of clear matte varnish. I didn’t want them as shiny as the other ones.

I couldn’t resist sprinkling on a little bit of glitter for some fun sparkle


Joining these link parties:
Feathered Nest Friday at French Country Cottage
Show and Tell Friday at My Romantic Home